Have you ever needed a clean product photo, profile image, social media post, or presentation visual, but the messy background made the image look unprofessional?
This is a common problem for small business owners, students, freelancers, marketers, and content creators who do not have graphic design training.
The good news is that background removal is no longer a task only trained designers can handle. With the right process, anyone can turn a cluttered image into a clean, sharp, and polished visual.
Removing an image background is not only about making a photo look nicer. It helps the main subject stand out, improves clarity, and gives your visual a more focused message.
A clean image can make a product feel more reliable, a profile picture look more confident, and a post appear more professional. However, the result depends on how you prepare the image, choose the right output, and review the final details.
Background Removal Basics
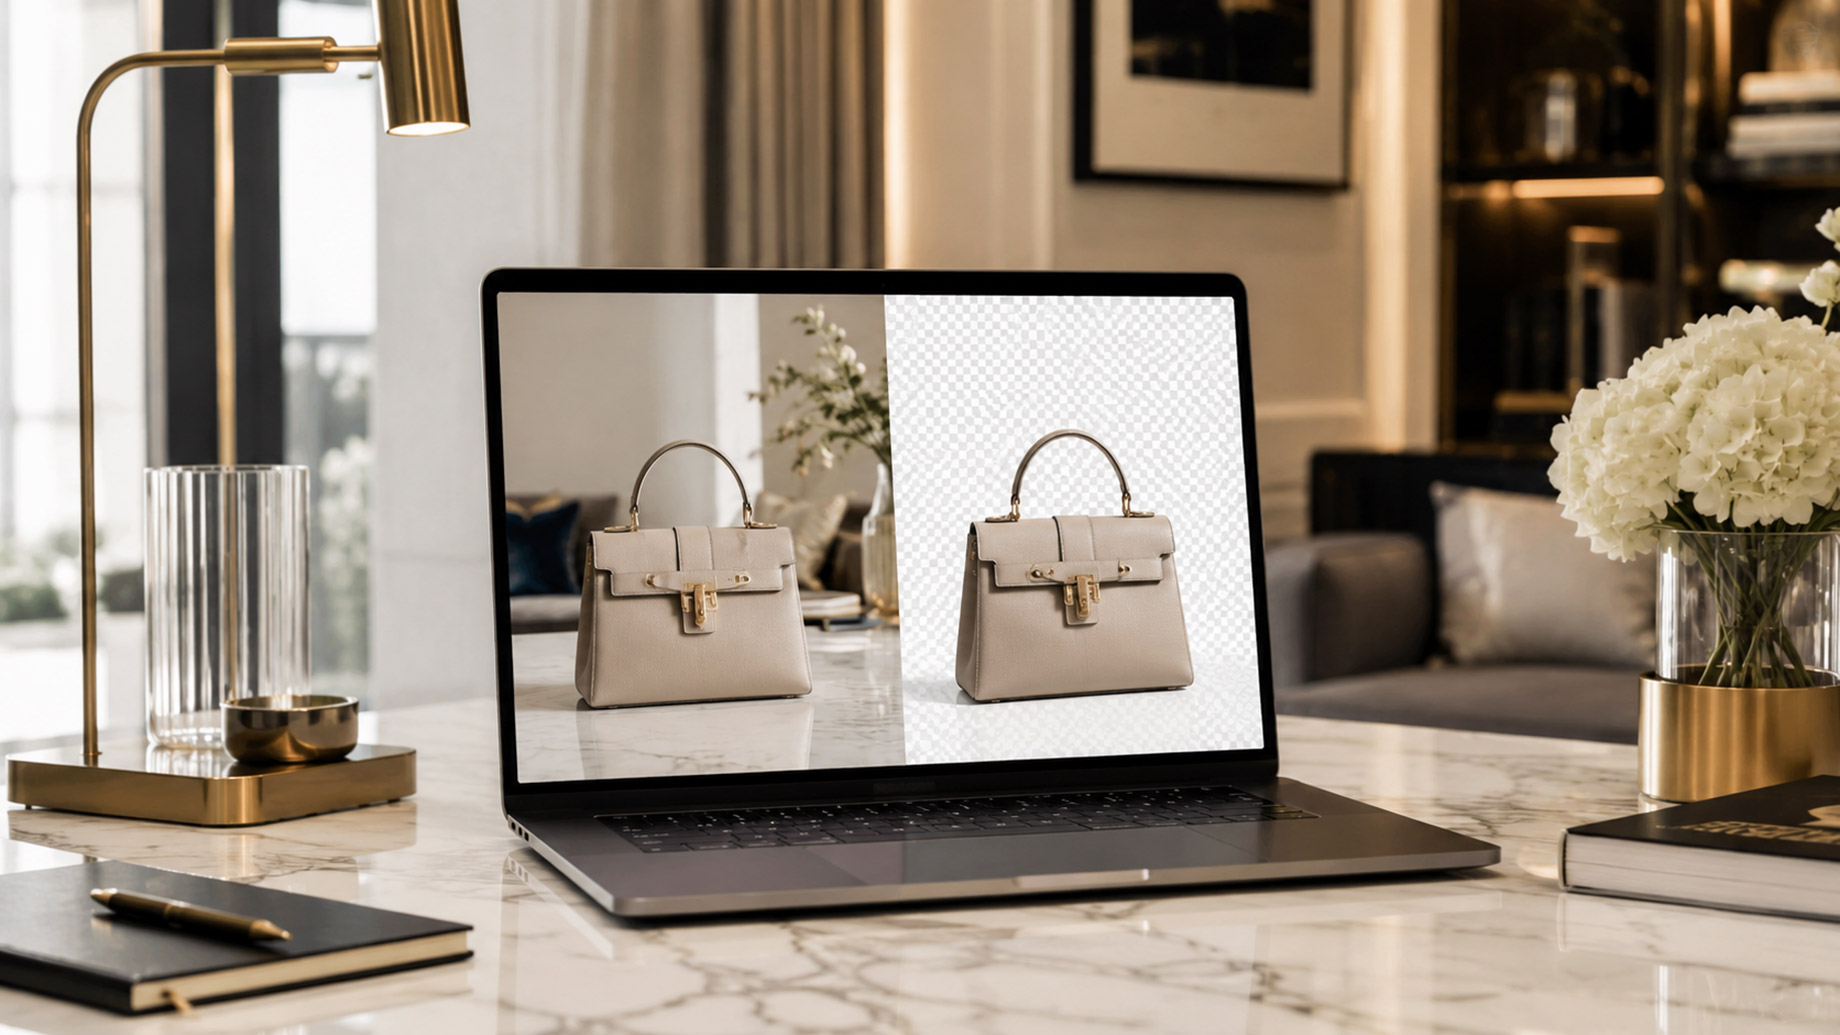
Background removal means separating the main subject from everything behind it. The subject could be a person, product, logo, animal, document, or object.
Once the background is removed, you can keep it transparent, replace it with a plain color, or place the subject on a new visual layout.
Why Clean Backgrounds Matter
A busy background pulls attention away from the main subject. For example, a product placed on a cluttered table may look less premium, even if the product itself is strong. A clean background fixes that issue by helping the viewer focus on what matters.
In business content, first impressions can shape trust. If an image looks sharp and clear, people are more likely to take the content seriously. This matters for product listings, resumes, online profiles, ads, reports, posters, and website images.
Clean visuals also reduce confusion. When the background is removed, the viewer does not need to search for the subject. The message becomes direct, and the image feels more intentional.
Smart Background Choices
Removing the background is only one step. The next step is deciding what should replace it, or if it should stay transparent. This choice depends on where the image will be used.
Transparent or Solid Background
A transparent background works well when the subject needs to be placed on different layouts. For example, a product cutout can be used on a website, flyer, catalog, or social media post without a fixed backdrop.
A white or light background works well for product images, documents, and clean professional visuals. It gives a simple look and keeps the focus on the subject.
A dark background can be useful when the subject is light-colored and needs stronger contrast. However, it should not make the image feel heavy or hard to read.
A soft color background can help social media graphics feel warmer and more polished. Still, the color should support the subject, not compete with it.
Simple Step Process
A clear process helps beginners avoid confusion. Instead of editing randomly, follow a step-by-step method from upload to final review.
Practical Steps
First, upload a clear image. Use the best version available, not a compressed or blurred copy. A higher-quality starting point usually creates a cleaner result.
Second, remove the existing background. Many users prefer tools that quickly remove background from images without requiring manual design work. This is useful when time is limited and the image needs to look clean fast.
Third, inspect the subject. Zoom in and check hair, hands, product corners, transparent items, and small details. These areas often need the most attention.
Fourth, choose the output style. Keep it transparent if you want flexibility. Add a white, light, or brand-safe background if the image needs to look complete on its own.
Fifth, download the correct file type. Use a transparent file format if the background must stay removed. Use a standard image file if the background has already been replaced.
Common Use Cases
Background removal is useful across many everyday tasks. It helps people who create content, sell products, apply for jobs, teach, present, or manage small projects.
Business and Content Needs
For online selling, a clean product image can improve trust. Shoppers often judge product quality through visuals before reading details. If the photo looks neat, the product may feel more credible.
For social media, background removal helps create sharper posts. A person, item, or object can be placed on a cleaner layout with text, color blocks, or simple shapes.
For presentations, a cutout image can make slides look less crowded. It also helps the speaker direct attention to the main idea.
For profile pictures, removing a distracting background can make the image look more professional. This is helpful for job applications, speaker bios, digital portfolios, and team pages.
For educational content, clean images make explanations easier. Teachers, trainers, and students can use cutouts in worksheets, charts, posters, and reports.
Edge Accuracy
The most important part of background removal is the edge. If the edge looks rough, the whole image can feel poorly edited. This is where careful review matters.
Details That Need Care
Hair is one of the hardest areas because it has fine strands and soft edges. A good result should keep the natural shape without leaving patches from the old background.
Glass, smoke, shadows, and transparent objects can also be tricky. These elements may blend with the background, so the cutout may need a closer check.
File Format Choices
Choosing the right file format prevents quality problems. Many beginners finish the edit correctly but save the image in the wrong format.
Use the Right Output
If you need a transparent background, choose a format that supports transparency. This keeps the subject cut out and ready for use on different layouts.
If you add a solid background, a standard image format is usually fine. This works well for website uploads, documents, posts, and basic sharing.
For print, use a high-resolution file. Low-resolution images may look acceptable on a screen but blurry on paper. For web use, balance quality with file size so pages load faster.
Also, keep a backup copy of the original image. If you need to make changes later, the original gives you more control.
Better Results Without Training
You do not need graphic design skills to get a clean result, but you do need a careful eye. The best results come from simple choices made in the right order.
Think Like the Viewer
A viewer does not care how the image was edited. They care if it looks clear, trustworthy, and useful. So, focus on the final experience.
If the image is for selling, ask if the product looks honest and attractive. If it is for a profile, ask if the person looks confident and approachable. If it is for a report or slide, ask if the image supports the point without adding visual noise.
Final Thoughts
Removing a background from an image no longer has to feel like a design challenge. With a clear photo, a simple process, and a careful review, anyone can create clean visuals for business, content, study, or personal use.